I have to admit that most of the photographs I took last year on the road were from my iphone 4. I struggle with the fact that they might not be considered serious images. The resolution is lower, overall quality is poor and some pros might say, it's only an iphone photograph. To my professional and fine art photographer friends, I would always respond to their compliment with, "well, it's just an iphone photograph." I even considered my year on the road as a failure in some respects because my larger camera rarely saw the light of day due to my laziness.
They always say that the best camera is the one you are carrying. For me, I take my iphone nearly everywhere I go. If I don't have it, there has to be some sort of reason I don't want to document something or I just want to go on a walk without it on purpose. Even then, there is a huge potential to miss an opportunity to photograph something.
If you follow me on Instagram (search Alison Turner "Alisontravels"), you'll know that I post just about everything I do through the lens of my iphone and sometimes fancied up with an Instagram filter. It's so easy to take a photo and click a button to share. It's also a nice collection of images from my life held in a place like a virtual scrapbook.
To hear that I was the winner in PDN's "Go Indie" photography contest in the Instagram/Hipstamatic category was a bit unbelievable. Thousands of images are uploaded every minute on social networks and because of the iphone, almost every corner of the world is being photographed. Six image from my iphone 4 "On the Road" series were picked and they chose four of those images to publish on a full page in the Spring 2013 edition of Emerging Photographer Magazine.
I still feel strange taking portraits with my iphone (scroll down my blog and you will see several), but it's what I have on me at all times so it will have to do. I'm even working on a new project that I will eventually share that's only taken with my iphone.
I am thankful to judge, Matthew Jordan Smith who chose my series as the winner and for PDN Emerging Photographer magazine who published it. I am starting to warm up to the idea that the tools you use for an image shouldn't matter. No matter what, I will continue to use the camera I have on my iphone. It's always with me and a part of me (ok, a BIG part) can't imaging going through life without taking photos.
As much as I would like to upload several beautiful images from my big camera, I left my card reader in Spokane and I haven't been on my computer in weeks. The last few posts were done with my iPhone and for me, it doesn't matter what equipment you use to get an image, as long as you are able to tell a story. I post photographs from my journey each day on instagram if you have that app in your iPhone, you can find me there.
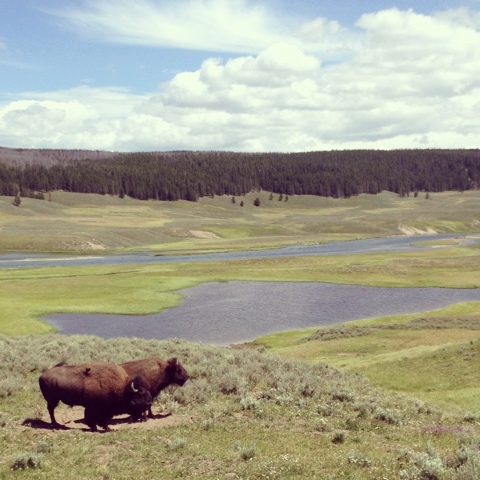
Yellowstone is my favorite National Park by far. Everytime I go, I discover something new and this trip was no exception. In fact, I think this was my favorite visit yet!
I was lucky enough to get three nights of camping by a last minute cancellation since the park was completely sold out.
Here are photographs I took with my phone. I hope it gives you an idea of what my experience was like. If you've never been to Yellowstone, I would highly recommend a visit.
I just realized that I haven't blogged since Max and I went to Yosemite! I will try to keep you posted here on my travels as much as possible but sometimes it's difficult when you run around without internet and the van is too hot to leave Max inside. If you would like to see photos from our journey every day, I post them on the instagram app under my user name, "alisontravels."
After we spent time in Yosemite, we traveled North and visited with good friends, Kristiana and Greg and then up to Chico, CA to hang out with my old college roommates, team mates and now lifelong friends, Rose and Heide. I spent the 4th of July with Heide's family and the rest of the time with Rose. I took Lucy (the name of my bike) out and towed Max behind in his trailer around the park. Chico is a great college town in the middle of Northern California with lots of space to ride your bike and get lost in the park. Back in the day, I used to be a lifeguard at Sycamore pool, otherwise known as the one mile pool. It was fun to go back and watch the kids swim around with their families in the usual hot summer heat.
I will try to blog more often and share experiences on the road here. If nothing else, I will post photos along the way. Here are a few from my visit in Chico, all taken with my iphone. More soon!
P.S.... The first round of postcards are in the mail! If you signed up, you should have yours... if you didn't receive one and want me to send you a postcard from the road, see the right side of the blog for details.
It's the project I dreaded...the self portrait. I'm taking a class and needed to come up with a self portrait this week. As with most photographers, I would rather be the one taking the photograph and not being the subject. However, I've seen some amazing examples of what some photographers are doing with self portraits. One of my new favorites is Kelli Connell. I also enjoy the self portraits from Jen Davis.
Seeing so many wonderful self portraits from so many talented photographers can both inspire and discourage you, depending on what your brain tells you. For me, I absolutely LOVE looking at photographs from all photographers and the group of self portraits that Aline Smithson presented were no different. Very inspiring! Self portraits can be discouraging since it's such a daunting task for some, me included.
I have many ideas in mind and I may or may not share them here. I will however, share this one. I took a break from my garage purge project to see if my idea of throwing my camera in the air would work. I have several photos of me jumping up and down in front of the camera while it's on a timer to laugh at myself and to see what comes from it. I thought, "why don't I stay still and have the camera jump around?" Well, I don't think I said that out loud but I wanted to try the timer idea to see if something could become of it. On my iphone, I have one application that automatically takes one photograph after a ten second countdown. I stood on grass just in case I didn't catch my iphone and because I don't have a cover or any type of insurance for it. The click of the "shutter" seemed to be delayed a bit so I would focus on my feet while it counted down and try to throw the camera in the air to get it to snap the photo around the same distance between my waist and feet.
I took around thirty or more shots and twenty of them I kept because there was a hint of me in the photo (strand of hair here, a toe there, etc.). Also, most were blurry since the phone tends to flip around when you throw it in the air. Once I had one in focus I stopped and put these two together. I still plan to do more self portraits down the road. For now, I will stay behind the lens.
You might have gathered that I like to take pictures. I have a few cameras but the one I use most often is the one in my pocket, my iphone. I usually have it with me wherever I go and it's easy to snap, edit and upload online or email to a friend with just a few clicks. I've used several apps on my iphone so I thought I would list my favorites along with some before (snapped with just my iphone camera) and after (edited on the phone with the application) shots to give you an idea of what you can do. This list are applications that I've used, but there are many more out there to play with. If you are interested with one, click on the name and you can see more examples of what it can do, or to buy the application. I am not affiliated with any of these programs, I just wanted to share some favorites so you can play with them to see what works for you and to have some fun!
Did I miss a good one? Let me know what your favorite is!
1.) Hipstamatic - $1.99 This might be the most popular app and I can see why. It takes you back to a time where imperfection is king and you don't know what you will get until it's "developed" in your phone. There are several lens, film and flash options to purchase to achieve the look you are striving for. I used this the most on my trip across the USA. I don't have a before and after since you take the shot directly through the app just like you would if you had the older film camera. You have just once chance to capture the image with the film and lens combination you choose. I put together a video of the photographs I took on the road with this app since it's hard to choose just one example from this app.
2.) Instagram - FREE If you want some old analog looks but want to take the perfect photograph before you edit, Instagram gives you that option. Unlike hipstamatic, you can take your photo before hand and then upload it to the application to edit and get the look you want. You will get a square image so you will need to crop or zoom your photo to fit the dimensions. You can also use this program to take photographs first then decide if you want to keep it to edit in the program. My favorite look is the "earlybird." This program also gives you the feature to post all of your final photographs online to show your friends. You can also choose not to use the social network option. The first photo of Max at the dog park is my original photo and the second is using the "earlybird" look in the selected editing options.
3.) Cross Process - $.99 If you like the photo you took on your regular camera but want to give it an extra punch, this is the easiest to use. Just take a photo, click on the program, choose your picture and it develops it right in front of your eyes to the same dimension you took the photo. There are options to choose the color combinations that is right for you. This is a fun, instant editing option. The photos on the left are the original and ones on the right were uploaded and developed in the cross process application with just one click.
4.)Shake it Photo - $.99 Just as the name implies, you shake your phone to develop your print. The app will automatically crop your photo to a square size and give it an added punch with a border. You have less control in this app, but it's easy to use and the sounds of a polaroid developing the print will give you the feel that you are developing your photo as you are shaking the phone. This application automatically crops your photo to a square so you don't have the ability to adjust it on your own, but it also adds a nice border. This is an example of a shot out of my camera phone and then through the shake it Photo application.
5.) Camera Bag - $1.99 Like your picture, but bored with the colors? Camera bag gives you the option to see your photo in all sorts of processing looks. From an instant look to a magazine shot, you get to choose. It even has a fish eye lens if you want a fun feel. My favorite is lens is the Lolo. The first shot is the original and second is using the "lolo" process in Camera Bag.
6.) Camera + - $1.99 My newest favorite of the bunch. This app does everything the others do and more. You can see your photograph in several processing options once you take it out of the lightbox to edit. It also has an HDR effect, which I like to use from this application. After you choose your process, you have the option for borders, flipping the image, cropping it and even backlighting darker shots. This is an example of the HDR filter. First photo is the original and second processed with the HDR effect.
7.) Infinicam - $1.99 As with Camera Bag, you can choose the process, borders and options to send as a postcard once you are finished. If you like a certain style, you can save to your favorites to use on any photo you choose from your library. This shot is with my normal camera and then the "Autochrome" filter on the Infinicam application.
8.) Pro Camera - $2.99 One of the features I like from this app is the ability to use a timer with your shot. The camera that comes with your iphone doesn't have this so if you want a self portrait that is further than arms length, click on this program to set up your phone, click the timer and run. I have the first edition and this is all I use it for but after researching it, there are many more options on this app. For the first shot, I used the Pro Camera for the timer and Cross Process for the border and processing. The second shot is using the pro camera app for the timer then a tilt shift lens for the blur and saturation (will talk about this app later in the post).
9.) Diptic - $1.99 Have a hard time choosing what pic is best of your trip to the lake, family gathering or swap meet adventures? This is the application for you. You can choose up to four images to put into one photo to showcase the best photographs in one. Here are some trees during a walk that I took on a fall day with different cameras on my phone and turned it into one photo with this application.
10.) Old Photo Pro - FREE Want to take a trip back in time? Upload a photo to the Old Photo Pro application and see what it would look like in the olden days, complete with scratches and torn paper at the edges. Just like the before and after photo of my camping spot in Florida. I can see what life would look like camping in the olden days...you know when they camped with this exact same tent.
11.) Tilt Shift Generator - $.99 As a bonus, my top 10 list goes to 11! If you want a SLR camera feel, but want it on your camera phone, use this application. From the photo you already took, you can upload it to this application, focus on one area on your pic and the application blurs the rest. As an example below, the first is the original pic, second is using the Tilt Shift Generator to put Max in focus and blur the rest, and the third is using the Tilt Shift Generated photo in Camera Bag with the Lolo effect with border. Confusing? You'll get the hang of it once you play around on your phone for a while with the applications. Need time? Take a six month road trip alone with no phone reception or television to keep you busy and you will learn all of these pretty fast.
I hope this post gives you some ideas to create your own personal style and most of all, have some fun with it!
Resolution word of warning: As with all camera phone photographs, you won't get the highest quality in resolution so use caution. Some of the apps will lessen the resolution of the photo once you take it.
As an example, this phograph I took using the hipstamatic app was selected to participate in the Fotoweek DC road show in the camera phone category but was later rejected because the resolution was too low. Hipstamatic has now changed a feature to include a higher resolution photo.
I tend to get bored easily. I am not one of the many people that can grab a book and sit on a beach and read all day. I am excited to report that I have read two more books from beginning to end to complete my, "5 books from start to finish" goal this year.
Another goal of mine that wasn't on the list was to put together art boxes from the photographs I've been taking with my iphone on this journey. I am happy to say that I completed this goal. Sometimes I get ideas in my head that I have to follow through and complete before I obsess too much about them. This project was one of those ideas.
I had these 4x4 photographs printed on archival paper and I mounted them on 4x4 wood blocks after I hand sanded them and applied primer with several coats of paint in either black or white. After I mounted the photograph on the finished block, I then applied several layers of non toxic clear matte finish to give the boxes a nice texture and durability. I am pleased on how they turned out.
Each box is signed on the back and I also put where the photograph was taken. Many of the photographs are featured in an iphone photography slide show I put together that you can view HERE.
I will continue to write about my travels but wanted to mention what I've been up to. I look forward to sharing more photographs of my adventures here soon.